最近受けている講座の中で、kerasに同梱されているデータセットの中に、Fashion-MNISTという画像データがあることを知りました。
画像データを使って機械学習を試す時(と言っても、自分が画像データを扱うことはほぼないのですが)は、
大抵手書き数字のMNISTデータを使っていて、いささか飽きていたので、早速これを確認してみました。
ドキュメントはこちら。
Fashion-MNIST database of fashion articles
手書き数字のMNISTと完全互換らしく、クラス数は10個、画像サイズは28*28、データ件数も訓練データ60,000とテストデータ10,000のデータになっています。
読み込みもほぼ同じです。
今回はデータセットの紹介なので、読み込んで実際に画像を表示してみるところまでやってみます。
from tensorflow.keras.datasets import fashion_mnist
import matplotlib.pyplot as plt

(x_train, y_train), (x_test, y_test) = fashion_mnist.load_data()
print("x_train.shape: ", x_train.shape)
print("y_train.shape: ", y_train.shape)
print("x_test.shape: ", x_test.shape)
print("y_test.shape: ", y_test.shape)
"""
x_train.shape:  (60000, 28, 28)
y_train.shape:  (60000,)
x_test.shape:  (10000, 28, 28)
y_test.shape:  (10000,)
"""
# 0〜9が どんなアイテムに対応しているかの対応はdatasetに含まれないので別途作る
target_name = {
        0: "T-shirt/top",
        1: "Trouser",
        2: "Pullover",
        3: "Dress",
        4: "Coat",
        5: "Sandal",
        6: "Shirt",
        7: "Sneaker",
        8: "Bag",
        9: "Ankle boot",
    }

fig = plt.figure(figsize=(10, 13), facecolor="w")
for i in range(100):
    ax = fig.add_subplot(10, 10, i+1)
    ax.set_xticklabels([])
    ax.set_yticklabels([])
    ax.imshow(x_train[y_train == i // 10][i % 10], cmap="gray_r")
    if i % 10 == 0:
        # アイテムの最初の画像にタイトルつける
        ax.set_title(target_name[i//10])

plt.show()
結果として表示される画像がこちらです。
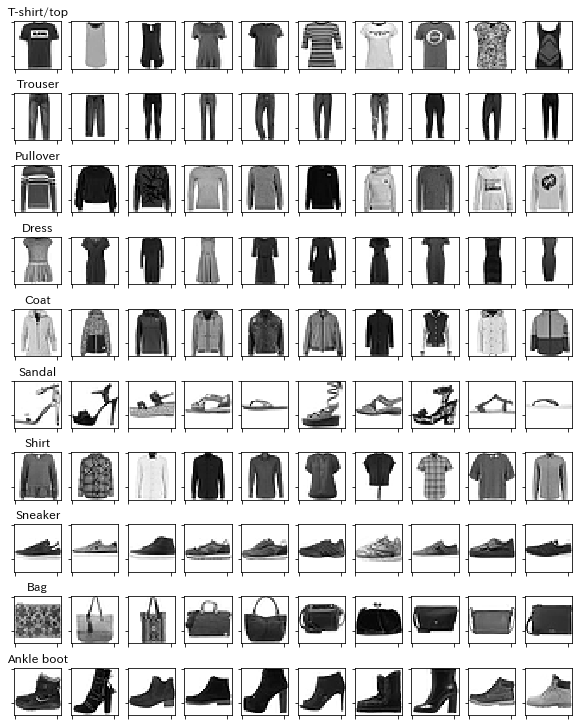
手書き数字のMNISTよりちょっと楽しそうなデータですね。
そして結構難易度たかそうです。